How to Calibrate a Nintendo Switch Controller (Joy-Con & Pro Controller)
If your character drifts left in Mario Kart when you are not touching the stick, or your aim in Splatoon feels a fraction off no matter how carefully you move, your controller almost certainly needs calibrating rather than replacing. It is a two-minute fix built directly into the Switch’s system settings, yet most guides either bury the steps in menus that no longer match the current firmware or stop short of explaining what to do when calibration does not actually fix the problem.
That second part matters more than it sounds. French regulators concluded in 2026 that Nintendo knew about widespread Joy-Con drift as early as 2018, years before it began openly addressing the issue, which is a strong signal that a meaningful share of “drift” complaints are worn hardware rather than a setting you forgot to adjust. Calibration resets software, not plastic and metal contacts.
Below is the exact process for Joy-Con, Pro Controller, and Joy-Con 2 on Switch and Switch 2, what each setting actually changes under the hood, what to do when the on-screen fix does not hold, and how to calibrate a Switch controller if you are using it on PC instead.
How to Calibrate a Switch Controller for Better Accuracy
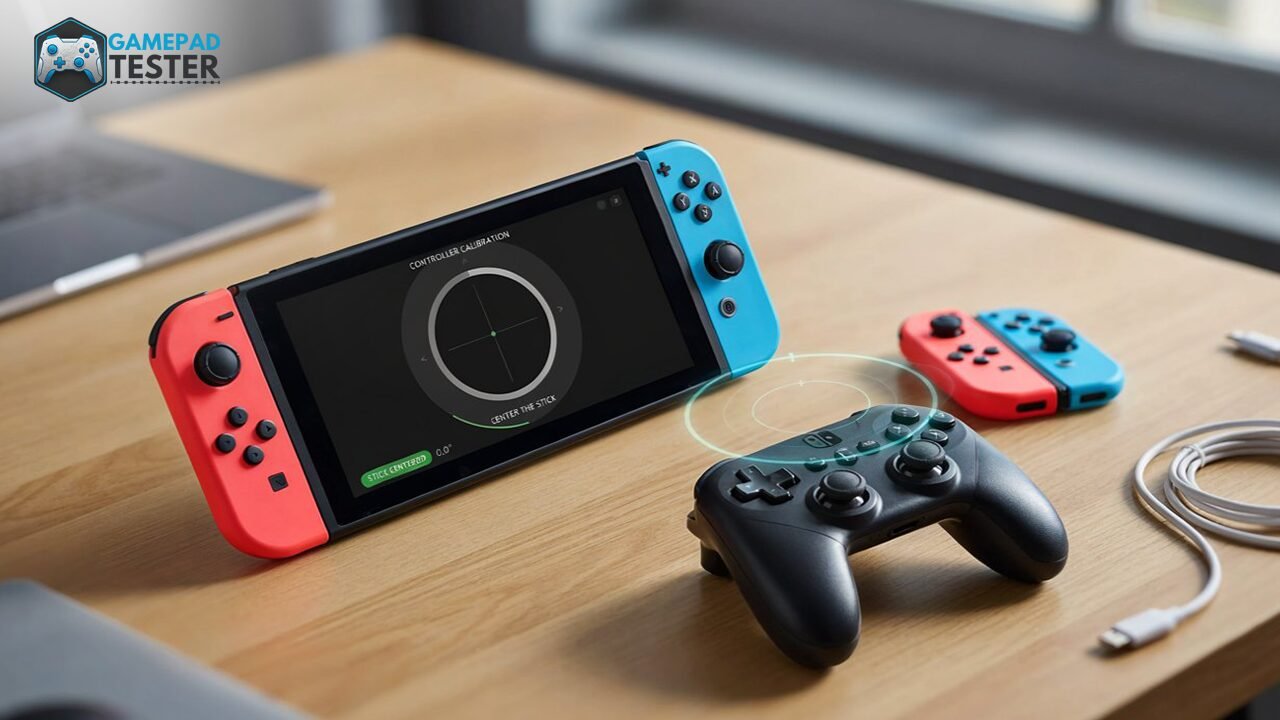
From the HOME Menu, go to System Settings > Controllers and Sensors (labeled Controllers & Accessories on Switch 2) and select Calibrate Control Sticks. Choose the controller and stick giving you trouble, fully tilt it in one direction and hold for a few seconds, then follow the on-screen prompts. For motion control issues such as aiming, steering, or camera drift in games that use gyro, select Calibrate Motion Controls instead, detach the Joy-Con from the console, place it flat on a stable surface with the stick facing up, and hold + or – until it finishes. The whole process takes under two minutes per controller.
What Calibration Actually Does (And Why It Sometimes Fails)
Calibration does not clean, repair, or replace anything inside the controller. It tells the Switch’s software where “center” and “full range” sit for that specific stick, based on the readings it takes while you tilt it. If the physical potentiometer inside the stick is worn, its readings drift and jitter on their own, so the software has nothing stable to lock onto. That is the entire reason recalibrating a badly worn stick either does not stick or only helps for a few minutes before the same drift creeps back in.
This distinction is the single most useful thing to understand before you start: calibration fixes a software reference point problem. It cannot fix a mechanical wear problem. Keeping that in mind saves you from repeating the same steps five times expecting a different result.
Step-by-Step: Calibrating Joy-Con Control Sticks
- From the HOME Menu, select System Settings.
- Scroll the left-hand menu down to Controllers and Sensors (Switch 2: Controllers & Accessories) and select it.
- Select Calibrate Control Sticks.
- Choose the Joy-Con and the stick you want to fix.
- You will see a circle with crosshairs and a green + marking where the system currently thinks “center” is. Fully tilt the stick in a single direction and hold it for a few seconds.
- Release the stick and check that the + returns cleanly to the middle with no drift or offset.
- Follow the on-screen prompt to confirm, then repeat for any other stick that is misbehaving.
If the fix does not seem to register right away, put the console to sleep and wake it back up, or reset the Joy-Con by pressing the tiny SYNC button once and pressing any button to power it back on. That forces the new calibration data to actually load into the current session.
Step-by-Step: Calibrating Motion Controls (Gyro/Accelerometer)
Motion calibration is a separate process from stick calibration, and it is the one people miss when their camera or steering drifts in gyro-aim games even after fixing the stick.
- Detach the Joy-Con from the console first. Motion calibration cannot run while it is docked to the rail.
- Remove any grip, strap, or wheel accessory.
- Go to System Settings > Controllers and Sensors > Calibrate Motion Controls.
- Place the Joy-Con flat on a stable, level surface with the analog stick facing upward, then hold the + or – button, whichever corresponds to that Joy-Con.
- Leave it untouched for a few seconds while the sensor recalibrates its baseline against gravity.
- Select OK once it confirms.
A stable, level surface matters more than people expect here. Calibrating on a soft couch cushion or an uneven desk gives the gyroscope a false gravity baseline, and that alone can reintroduce the exact camera drift you were trying to fix.
Calibrating a Pro Controller
The Pro Controller uses the same Calibrate Control Sticks and Calibrate Motion Controls menus, with one practical difference: since it is a single unit rather than two detachable Joy-Con, you do not need to remove anything before running motion calibration. Connect it via USB-C or Bluetooth, open the same Controllers and Sensors menu, and select the Pro Controller from the list before choosing which stick or sensor to recalibrate.
Joy-Con vs. Pro Controller vs. Joy-Con 2: What’s Different
| Joy-Con (Switch 1) | Pro Controller | Joy-Con 2 (Switch 2) | |
|---|---|---|---|
| Menu path | Controllers and Sensors | Controllers and Sensors | Controllers & Accessories |
| Stick type | Potentiometer-based | Potentiometer-based | Hall-effect (magnetic), less prone to wear-based drift |
| Motion calibration | Must be detached from console | Calibrated while connected via USB-C or Bluetooth | Must be detached from console |
| Sync/reset button location | Top edge, small hole | Top edge, near USB-C port | Next to SL (right) or SR (left) button |
| Typical drift cause | Worn potentiometer contacts over time | Less common, but same wear mechanism | Rare; magnetic sensing resists the wear that causes classic drift |
The practical takeaway: if you are buying a replacement controller specifically to avoid drift, Joy-Con 2’s Hall-effect sticks are a meaningful upgrade over the original Joy-Con’s potentiometer design, which is the root cause most repeat-drift complaints trace back to. Potentiometer sticks read position through physical contact against a resistive strip, and that contact point wears down with use in exactly the same way an old volume knob gets crackly. Hall-effect sticks read position magnetically, with no physical contact to wear out, which is why manufacturers across the industry, not just Nintendo, have been shifting toward them.
How to Tell If You Need Calibration or a Repair
Before you calibrate, it helps to know what you are actually looking at. Run through this quickly:
- Stick returns to center but the game still shows drift: this is almost always a calibration issue. Fix it with the steps above.
- The on-screen crosshair marker itself jitters or jumps around on its own, even when you are not touching the stick: this points to a worn potentiometer, and calibration will not hold.
- Drift comes back within minutes of calibrating: same as above, mechanical wear rather than a software offset.
- The stick feels physically loose, gritty, or clicks in a way it did not before: physical damage or dust ingress, which calibration cannot resolve.
- Everything reads correctly in the calibration menu but a specific game still feels off: check whether it is actually a controller deadzone setting in that game rather than a hardware issue at all.
When Calibration Doesn’t Fix the Problem
This is the part most guides skip. Calibration resets software reference points, but it cannot repair a physically worn stick module. If you have calibrated correctly and the drift returns within minutes, or the crosshair marker jumps and jitters instead of sitting still, you are likely dealing with mechanical wear rather than a miscalibration. In that case:
- Try fixing stick drift directly, which covers cleaning contacts and other non-software fixes before you consider a repair or replacement.
- Check whether the issue is actually a deadzone problem rather than true drift. A poorly set deadzone can look like drift in-game even when the physical stick is fine.
- If the Joy-Con is still under warranty, or was affected by the well-documented Joy-Con drift issue, Nintendo has offered free repairs outside the standard warranty window in several regions since 2023, following years of consumer complaints and, in 2026, a French regulatory fine over how the company disclosed the defect.
For context, in June 2026 the French Directorate-General for Competition, Consumer Affairs and Fraud Control fined Nintendo of Europe roughly 35 million euros after an investigation found the company knew about widespread Joy-Con responsiveness and drift failures as early as 2018 but did not inform consumers until 2020. Regulators also found that Nintendo’s early public messaging focused narrowly on unresponsive buttons rather than the broader drift defect, which discouraged some owners from contacting Nintendo’s after-sales service and led them to buy replacement controllers instead. Nintendo agreed to the fine without admitting wrongdoing. It is worth knowing this if you have been paying out of pocket for replacement Joy-Con rather than requesting a repair, since it strengthens the case that drift is a known hardware defect and not user error on your part.
Calibrating and Testing a Switch Controller on PC
Joy-Con and Pro Controllers both work over Bluetooth or USB on Windows once paired, but the Switch’s own calibration menu obviously is not available outside the console. If you are using either controller for PC gaming or emulation:
- Pair it following the same process as connecting a controller to PC.
- Use a gamepad tester tool to visually confirm stick centering and check for input drift in real time, since Windows will not warn you the way the Switch’s own calibration screen does.
- If the sticks read correctly on Switch but drift on PC, the issue is usually a driver-level deadzone setting rather than the physical hardware, since the Switch’s calibration data does not carry over to PC input mapping.
- If you also want to remap buttons for a more PC-native layout, see remapping controller buttons on PC.
- If precision aiming still feels off once the drift itself is resolved, that is usually a sensitivity curve issue rather than a calibration one; see controller sensitivity for better aim for how to adjust it.
If the controller disconnects mid-session while you are testing, that is a separate Bluetooth issue rather than a calibration one. Why controllers keep disconnecting covers that specifically. And if the controller is not being recognized at all rather than just misbehaving, start with why is my controller not working before assuming it needs calibration.
How This Compares to Calibrating Other Controllers
The overall logic of resetting the stick center, verifying it against a visual crosshair, and confirming is nearly identical across consoles, but the menu paths differ. If you also game on other platforms, see how to calibrate a PS5 controller or how to calibrate an Xbox controller for the equivalent steps on those systems.
Final Thoughts
Calibration is the right first move for almost any Joy-Con or Pro Controller stick issue, it takes under two minutes, and it is built into the console with no extra software needed. But it is a software reset, not a repair, and the growing body of evidence around Joy-Con drift, including the 2026 regulatory finding against Nintendo, makes clear that a real share of “drift” is worn hardware that calibration was never going to fix. If recalibrating does not hold, do not keep repeating it. Move on to checking for physical wear, cleaning the stick module, or requesting a repair, and consider Hall-effect controllers like Joy-Con 2 if long-term drift resistance matters to you going forward.